Davinci Resolve hosted on a NAS for Multi User Collaboration

HERE IS HOW TO CONFIGURE A QNAP NAS TO HOST A RESOLVE POSTGRES DATABASE

With the latest versions of Blackmagicdesign Davinci Resolve Studio we can work multi user in a collaborative environment using a central Postgres database.

This allows us to open a project at the same time on different machines. One can do ingest and syncing, another can start the editing, while someone else does exports, color grading or sound mixing.
Bin locking and Timeline locking on 1 tab is supported.

https://mixinglight.com/color-tutorial/davinci-resolve-14-mythical-collaborative-workflow-is-here/
https://blog.pond5.com/18201-post-production-collaboration-made-simple-davinci-resolve-14-studio/
https://www.youtube.com/watch?v=3dQoqBwJ2gM


267_1487217563_TS-1685_front.png

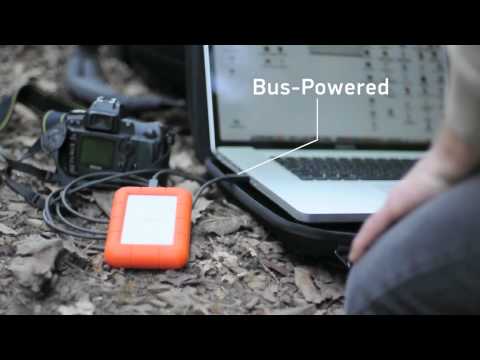
You can install Postgres on a Mac or Windows workstation to share it, but it is even easier to install it on your QNAP NAS.
Recommended QNAP systems to use for file sharing in video-editing environments are the TVS-1282 series and the TS-1685 or the rack version similar to the TVS-EC1680.
These can be used for Adobe Premiere, Final Cut Pro X , Avid ( using Mimiq ) and of course Davinci Resolve.

To start, install PostgreSQL from the QNAP app store and restart.

By default the Postgres database engine is only accessible from within the QNAP server itself.
But in this case we want to access the database from our Davinci Resolve workstation, so we need to change 2 parameters on the Postgres of the QNAP:

- Allow external TCP/IP connections by modifying the pg_hba.conf file, you have to add a client authentication record so that external ip's have access.
 
- Alter the listening addresses in the postgresql.conf so it will listen to external ip's and not only its localhost ip addresses.

How do we do this :

1. First, make ssh connection to the QNAP via command line:

On the Mac open Terminal ( /Applications/Utilities ) and enter:

ssh admin@10.0.73.180

The IP number (10.0.73.180) needs to be replaced with the IP number of your QNAP

Accept ssh access and enter the admin password of the QNAP
Now you have a command line interface with the QNAP, which is a unix based system.

Then, locate the pg_hba.conf file:

find / -name pg_hba.conf

This gives us the path to the file on the QNAP: in our case /share/CACHEDEV1_DATA/.qpkg/PostgreSQL/postgresDB/

To see its content use:

cat /share/CACHEDEV1_DATA/.qpkg/PostgreSQL/postgresDB/pg_hba.conf

Before modifying this file we make a backup :

cp /share/CACHEDEV1_DATA/.qpkg/PostgreSQL/postgresDB/pg_hba.conf /share/CACHEDEV1_DATA/.qpkg/PostgreSQL/postgresDB/pg_hba.conf.backup

Then we append the necessary changes to the pg_hba.conf file.
This can be done  with the unix texteditor vi ( https://ryanstutorials.net/linuxtutorial/cheatsheetvi.php ) on the QNAP, or much easier:

echo "host    all             all             10.0.73.0/24            trust" >> /share/CACHEDEV1_DATA/.qpkg/PostgreSQL/postgresDB/pg_hba.conf

In this example our QNAP and computers have IP numbers in the 10.0.73.x range, replace this with your IP range.

The option to use md5 or password as security system doesn't work with Davinci Resolve, so the only protection is now the masking with IP numbers and network range.
If you have a private network, this is probably not an issue. Perhaps in the future we can use user/password with Davinci Resolve.

TIP: If you use a text file to prepare the commands and then copy-paste in terminal, make sure that smart quotes are off = in apple text editor app , preferences,  disable all these options at the bottom.
You DON'T want smart quotes: we need  " " and NOT the  'smart'  ” “

To check that the modification is done , you can do another cat and see that the file is modified at the end.

cat /share/CACHEDEV1_DATA/.qpkg/PostgreSQL/postgresDB/pg_hba.conf

2. Alter the postgresql.conf file:

Locate the file:

find / -name postgresql.conf

which gives in our system : /share/CACHEDEV1_DATA/.qpkg/PostgreSQL/postgresDB/postgresql.conf

Check its content:

cat /share/CACHEDEV1_DATA/.qpkg/PostgreSQL/postgresDB/postgresql.conf

Make a backup before modification:

cp /share/CACHEDEV1_DATA/.qpkg/PostgreSQL/postgresDB/postgresql.conf /share/CACHEDEV1_DATA/.qpkg/PostgreSQL/postgresDB/postgresql.conf.backup

Add the modification, to enable external access to the database:

echo "listen_addresses = '*' " >> /share/CACHEDEV1_DATA/.qpkg/PostgreSQL/postgresDB/postgresql.conf

Check if the modification was correct:

cat /share/CACHEDEV1_DATA/.qpkg/PostgreSQL/postgresDB/postgresql.conf

To make both modifications active, you need to restart the QNAP.

Now the QNAP system is ready for Davinci Resolve access from the network.

When we log in to resolve we use : username postgres with password davinci,
but it could be anything as the setting is "trust" in de the pg_hba.conf

If you need to find the names of your Davinci Resolve projects on the Postgres server,
you can login on the QNAP's webpage, start the postgres app and login with the user postgres, no password.

disclaimer : Use this tutorial at your own risk

Extra considerations when using this setup :
- Take backups  https://www.premiumbeat.com/blog/resolve-14s-auto-save-functions/
- Postgres databases use a lot of small files that change all the time, so it would be better to put them on a separate SSD volume on the QNAP.
- Sometimes browsers and text editors will mess up " " with 'smart'  ” “ this will mess up your settings file.

Lacie Rugged USB3 Thunderbolt Series

Onze wereld draait volledig om deadlines. Wanneer digitale opslagruimte van cruciaal belang is voor uw project, moet uw opslagapparaat net zo snel en betrouwbaar zijn als uzelf. Of u nu op kantoor werkt of in de wildernis, uw apparaat moet geschikt zijn voor aansluiting op elke computer, meer dan voldoende snelheid bieden voor de meest veeleisende toepassingen en gegevens beschermen tegen elke dreiging. En dat is waar de LaCie Rugged USB 3.0 Thunderbolt Series zijn intrede doet.

Universele aansluitmogelijkheden

Laat uw project niet ontsporen doordat externe schijven/computers niet compatibel zijn. Met zowel een USB 3.0- als een Thunderbolt-interface is de LaCie Rugged de perfecte keuze voor uw Mac en pc. En omdat USB 3.0 achterwaarts compatibel is, kunt u de LaCie Rugged aansluiten op elke standaardcomputer ter wereld. De LaCie Rugged kan dankzij de meegeleverde USB 3.0- en Thunderbolt*-kabel ook volledig draaien op busvoeding. Door de ongekende mobiliteit en diverse interfaces is dit de perfecte aanvulling op een nieuwe Mac

Compromisloze snelheid

Profiteer van bliksemsnelle overdrachtsnelheden op zowel Mac als pc dankzij de USB 3.0- en Thunderbolt-interface. In de SSD-versie biedt de LaCie Rugged een snelheid tot wel 380 MB/s, waardoor dit het allersnelste product met busvoeding is dat ooit op de markt werd gebracht**. De HDD-versie biedt een snelheid tot 110 MB/s, wat een verbetering van 35% is ten opzichte van FireWire 800**. Maak back-ups en verplaats bergen gegevens in een fractie van de tijd die het voorheen kostte. Of blader nu nog sneller door uw fotobibliotheek.

Volledige gegevensbescherming

Bij het halen van uw deadlines is het van cruciaal belang dat u uw gegevens goed beschermt. Een ongelukje ligt immers altijd op de loer. Daarom voldoet de LaCie Rugged aan de MIL-norm en zijn gegevens beschermd tegen onopzettelijk vallen vanaf een hoogte tot 1,2 meter. Of de LaCie Rugged nu van uw bureau valt of uit de zak van uw safari-jas: u kunt erop vertrouwen dat uw gegevens nog steeds toegankelijk zijn. De SSD-versie gaat nog een stapje verder voor de ultieme trillings- en schokbestendigheid. Beide versies zijn zo robuust dat ze vol vertrouwen per post naar klanten of partners kunnen worden gestuurd. De meegeleverde software beschermt uw bestanden met 256-bits AES-encryptie ook tegen nieuwsgierige ogen.

Hoe kan ik pdf's kleiner maken voor de voor de digitale aangifte van een bouwaanvraag op Apple Mac OSX?

Bij de digitale aangiftes mogen de individuele pdf's niet groter dan zijn dan 50MB.
bron: https://www.omgevingsloket.be/digitaalloket/regelgeving

Wanneer je foto's of scans invoegt in tekeningen die gemaakt zijn met Vectorworks, ArchiCAD, AutoCAD of Graphite worden de pdf's snel te zwaar om deze digitaal in te kunnen dienen.
Het zelfde geldt voor foto's in Word document.


Op een Apple Mac met OSX kan Je deze pdf's makkelijk verkleinen door een Quartz-filter* toe te passen:
Bij het printen:
Geef het Print commando. Kies in het Pdf dialoogvenster linksonder voor 100dpi.qfilter
De Pdf file wordt bewaard op het bureaublad.


Een reeds gemaakte Pdf kan je achteraf verkleinen:
Open de Pdf met Apple Voorvertoning. In het menu Archief kies je Exporteer..
Kies bij Quartz-filter Reduceer 100dpi en bewaar.

* Installeer de Quartz-filter door dit bestand te plaatsen in de map Macintosh HD:Bibliotheek:PDF Services

How to share Final Cut Pro X Libraries in network using NFS

Unlike Final Cut Pro 7 Projects, Final Cut Pro X libraries cannot be opened or saved to an AFP or SMB share point. It needs to be on a local storage or on a San. Using a San ( Xsan or metaSAN ) is more complex and requires a bigger budget for postproduction companies with only a few edit suites.

Locally mounting sparse images that reside on the server is an older workaround which is well documented, but has disadvantages.

An other option is to use NFS as a file sharing protocol as pointed out by Amanda Burns at Florida Atlantic University and Bob Zelin.

NFS ( Network File System ) is a file sharing protocol allowing a user on a client computer to access files over a network much like local storage is accessed. It is build into every Mac running OSX as it is one of the building blocks of UNIX.

Setting up the server side will normally require advanced command line skills.
But with NFS Manager from Marcel Bresink you can configure everything through a convenient user interface. You also don’t need OSX Server, so any Mac can be used as an NFS Server. On the client side you don’t have to install the Bresink software.

Let's dive into it:

With NFS, there is no login or authentication system. The way to limit access is to define an IP subnet or a list of IP addresses that can access the NFS server. We need to designate witch user-id will be used when creating or modifying files. This means that all client computers will use the same user-id to access the server. In a small setup it is probably not a problem.

For security and performance we could consider connecting the edit stations to a separate ethernet switch with an 10GB uplink to the server.

In this example we made a user called fcp on the server, which will be used for that purpose . If you would access the fileserver via SMB or AFP protocols you should also login with that same user.

Our Setup:

Server Mac mini with OSX Mavericks 10.9.2 and a fast external RAID disk; Client MacBook Pro with Mavericks 10.9.2; Gigabit Ethernet Switch; Final Cut Pro X 10.1.1; NFS Manager 3.9 ( witch offers full support for OS X Mavericks )

Steps:

Download the NFS Manager application at www.bresink.com.
You can evaluate the application in demo mode without functional restrictions. It only costs 17,85€. On the homepage there is a warning about Mavericks, but to my experience version 3.9 works fine.  

After download, move the application to your Applications folder or Utilities folder.

Before starting NFS Manager, check the System Preferences

Go to Sharing

Give the server a 'normal' Computer Name. Avoid spaces in server names and disk names.

Here our server is called videoserver and will be found on the network as videoserver.local

Go to Network

In our example, we added a additional thunderbolt ethernet adapter to double the bandwidth when using multiple clients. I's better not to use DHCP, but manually define the ethernet address of the build in ethernet  and the thunderbolt ethernet adapter. Your IP addressing range will probably be different.

Go to Users & Groups

Besides the admin user, we recommend making a second user ( here fcp ) for normal use. In Login Options, set this user to login automatically when the server is started. This way the fcp user can also view and use the files on the shared volume, and will be also the user-id that network clients will use. If you have a small setup of 2 or 3 computers, the server can also be used as a normal editing station this way.

Go to Sharing

If you also need file sharing for machines that don’t use FCPX, you can activate the normal File Sharing. In this example our volume RAID, is also be shared using AFP and SMB, and is accessible using the fcp as login. The AFP en SMB file sharing is optional and not needed for the NFS sharing.

Launch NFS Manager

It will tell you the software runs in Demonstration Mode. This will disappear once you bought the application. Ignore the warning about DNS. 

Go to Share Definitions and press the + icon

Press the Select button to select the volume of folder you which to share, than change also the other settings as indicated.

Click on Show advanced options and change the settings as indicated

Close and the click on Apply.

Now the setup is done, you could check your other settings as below, but standard values will be good. If there is nothing in Shared Objects, reboot the mac and recheck in NFS manager.

Quit NFS Manager, setup of the server is done!

If you reboot the mac all values should still work.

Go to your client computer

In this case their IP address should be in the network segment 10.0.73.xxx

To connect to the server go to Finder, menu Go, Connect to Server and enter nfs://videoserver.local/Volumes/RAID
If you have a server with a fixed IP, you could enter in our example nfs://10.0.73.202/Volumes/RAID or if you want to use the second ethernet port, use nfs://10.0.73.203/Volumes/RAID

Click connect and its done... Use the + to keep a list of the servers.
 

For easy access to your NFS server : in finder, menu Go, Computer, and drag an alias of the NFS share to your desktop, and perhaps to your sidebar as a favorite.

That's it, you can start editing.

If it doesn't work or you need somebody to help you to set it up in your setup we can probably help you, it's our daily job as an Apple Authorised Reseller and Integrator.

EID installeren op Mac OS X voor Tax-on-Web, Intervat ...

Via deze link kan u zéér nuttige tips vinden: http://loginhulp.be

Hierbij een aantal tips ivm het gebruik van een EID cardreader op Mac OS X:

Gebruik voor ouder versies van OSX Firefox ( niet Safari of Google Chrome ) versie 16.0.2. Je kan deze versie hier downloaden. Recentere versies zijn soms niet compatibel met de EID middleware.

Gebruik de laatste middleware software. Deze kan je hier downloaden. 

Start Firefox pas op als je de cardreader met identiteitskaart reeds aangesloten hebt.
Herstart Firefox indien de cardreader met identiteitskaart nog niet in zat.

Wanneer u uw pincode drie keer verkeerd ingeeft zal uw kaart geblokkeerd worden.

Test de goede werking hier

FAQ PDF-Handtekening

Client Diagnose